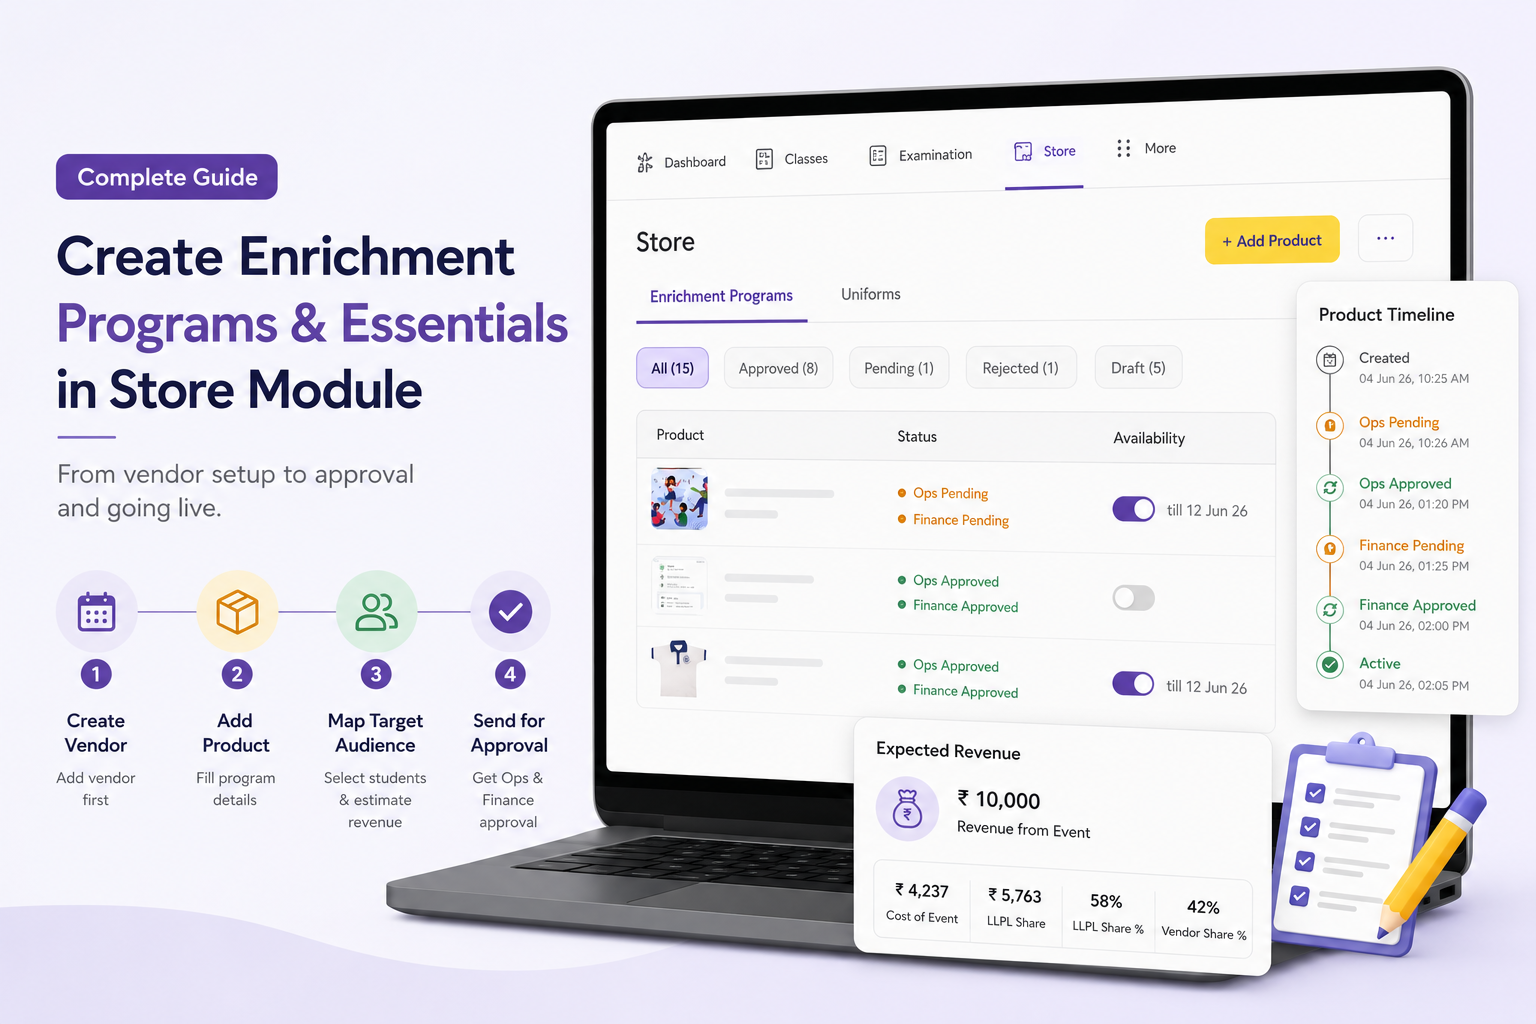
Overview
This guide explains how a Store Manager can create Enrichment Programs and Essentials in the Store Module from the staff portal.
Before creating a product, please make sure the required Vendor is already created in the system.
What You’ll Learn
- how to log in and open Store Management
- how to create a Vendor
- how to create an Enrichment Program or Essential
- how to fill product details and send for approval
- how to track approval status and rejection notes
Who Can Use This
Applicable Role:
- Store Managers
- Account Managers
Before You Begin
Please keep the below details ready before creating the product:
- product / program name
- description
- group, category, and sub-category
- vendor details
- pricing details
- target audience details
- at least one image
You can upload up to 5 images / videos, and each file can be up to 20 MB.
Step 1: Log in to the staff portal
Open the staff login page.
- Select Staff
- Enter your login credentials
- Click Proceed
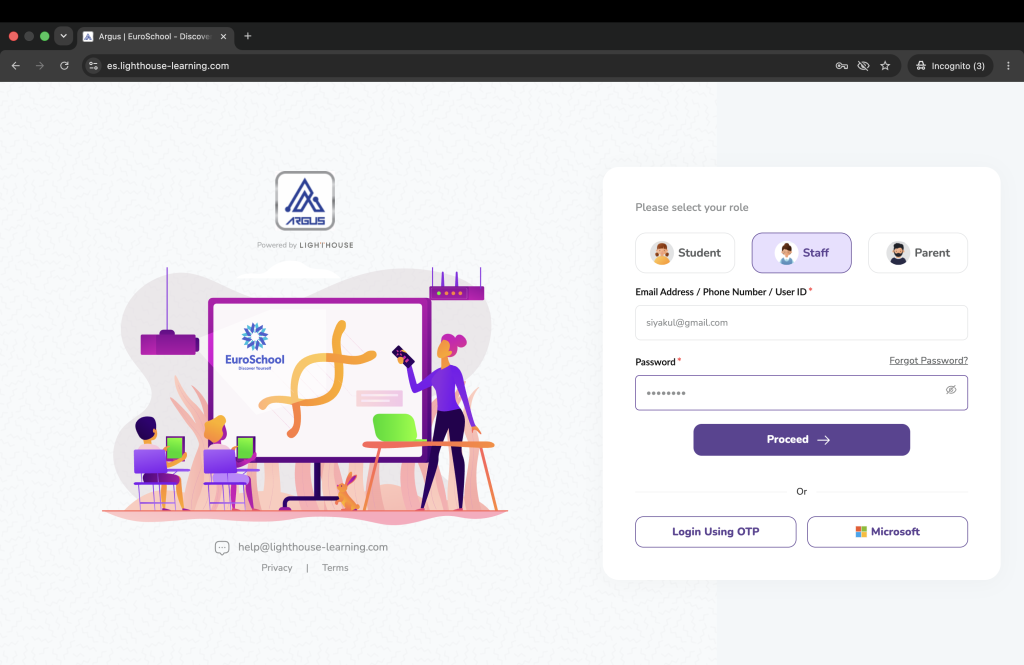
Expected Result: You are logged in successfully.
Step 2: Open Store Management
After login:
- go to School Management
- click Store Management
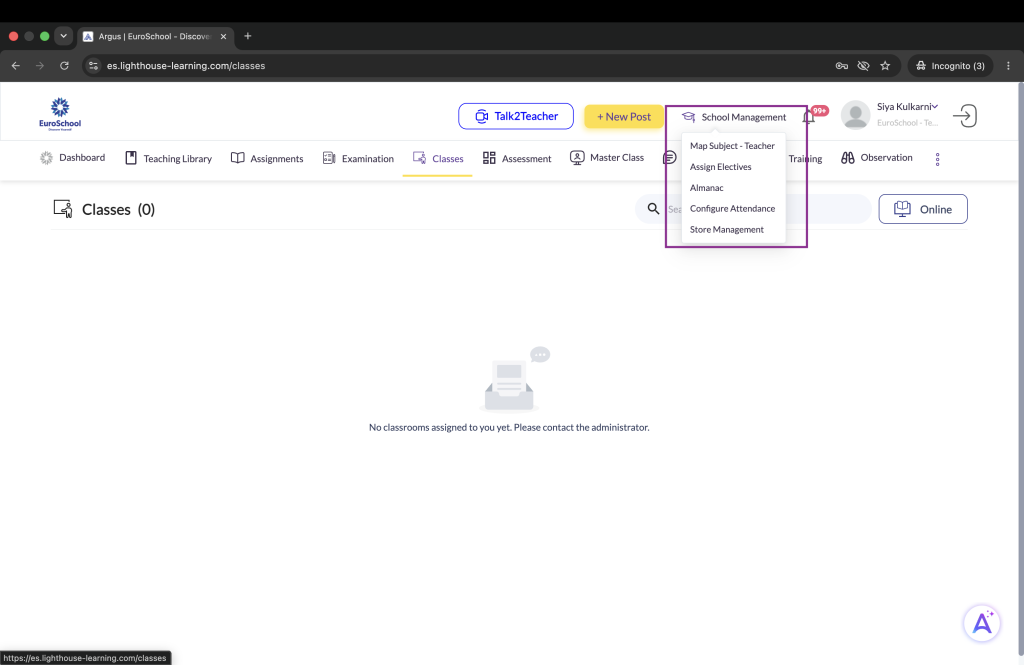
Expected Result: You land on the Store page.
Step 3: Create the Vendor first
Before creating a product, please first check whether the required vendor is already available.
- Click the three-dot menu
- Open Vendors
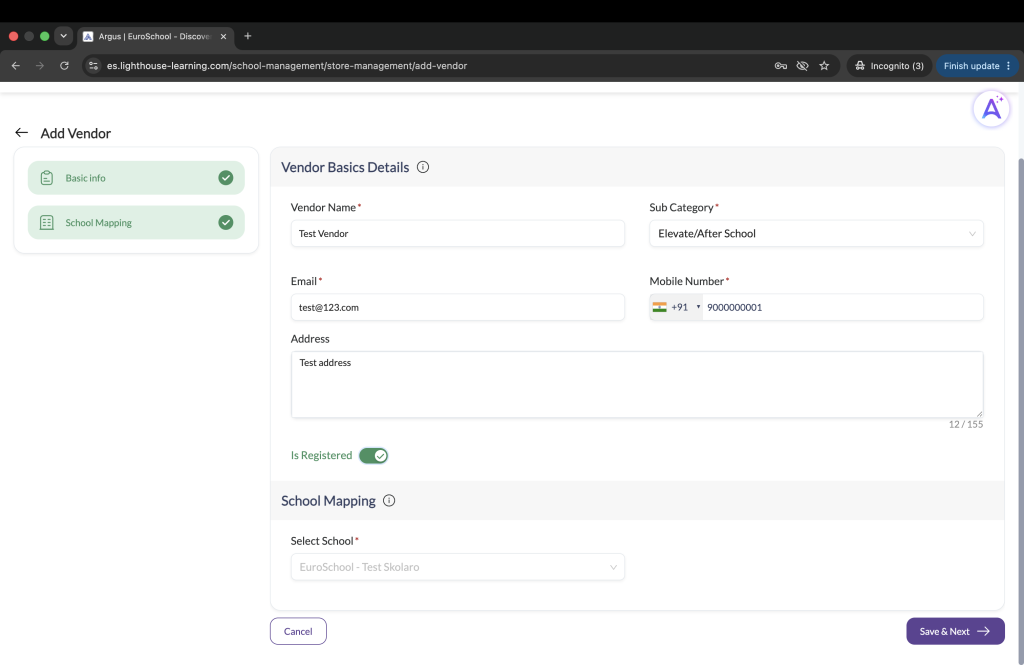
- If the vendor is not available, create it by filling the required vendor details and save it
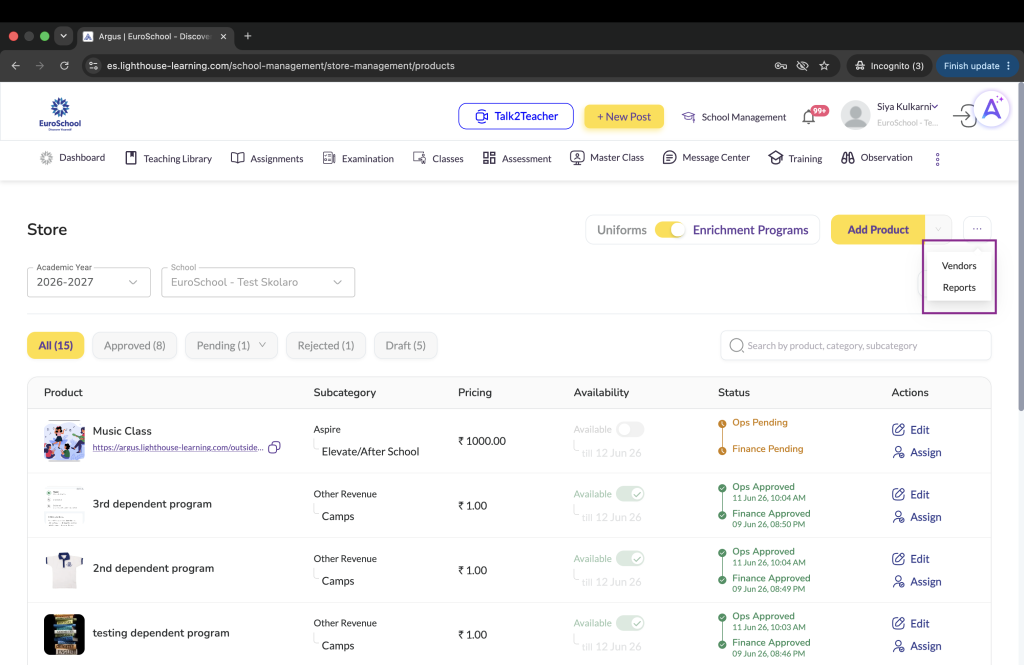
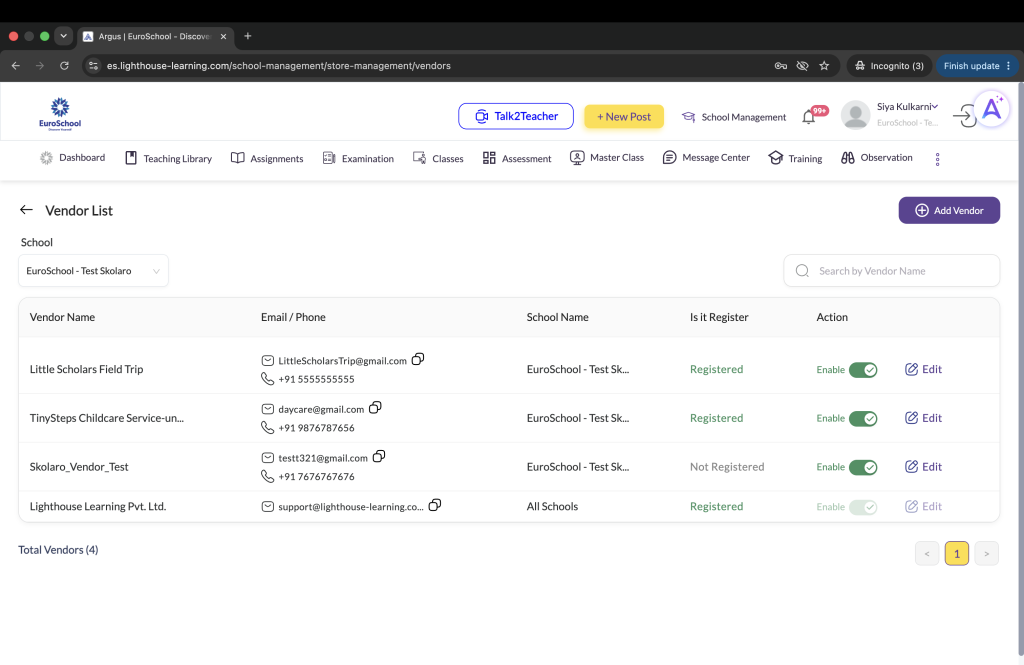
Expected Result: The required vendor is available for product creation.
Step 4: Click Add Product
Go back to the Store Management page.
- keep Enrichment Programs selected
- click Add Product
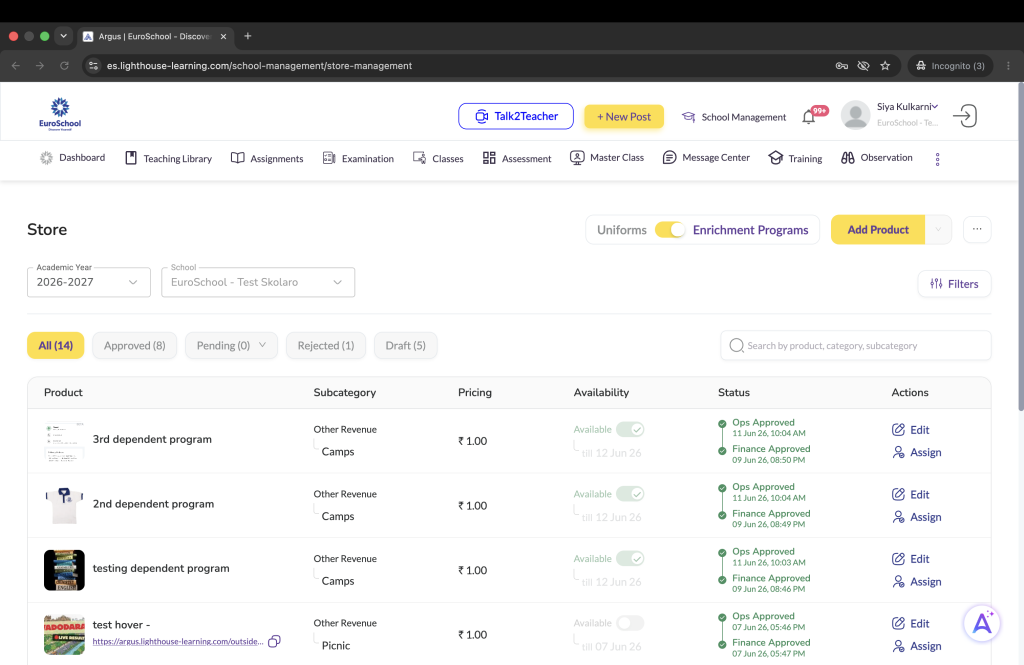
Expected Result: The Add New Product page opens.
Step 5: Fill Basic Info
In Basic Info, fill the required details:
- group, category, sub-category
- product / program name
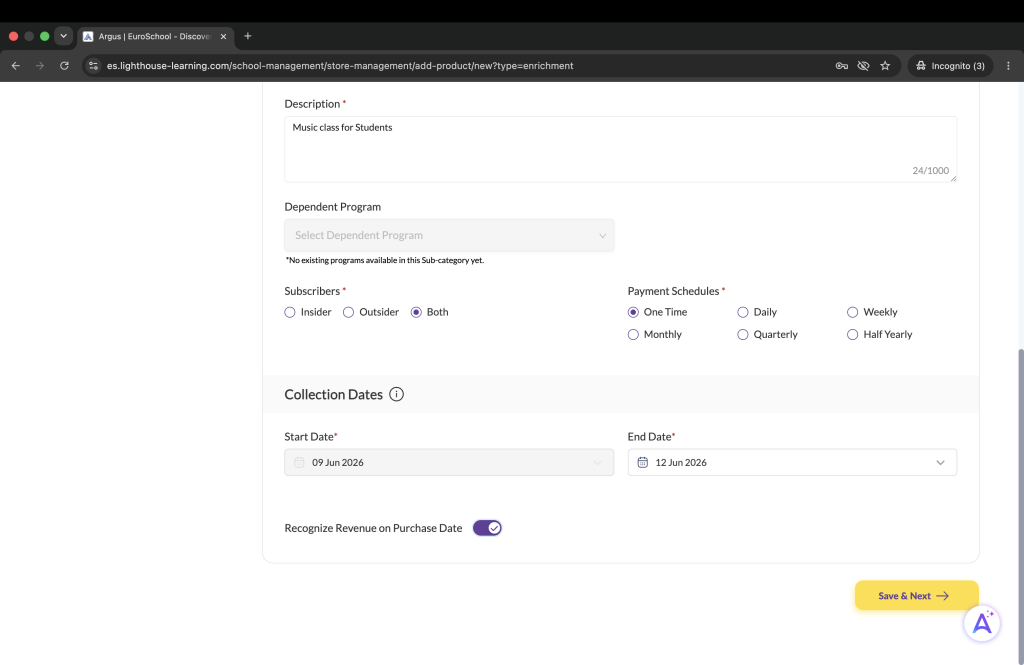
- description
- image / video
- dependent program, if applicable
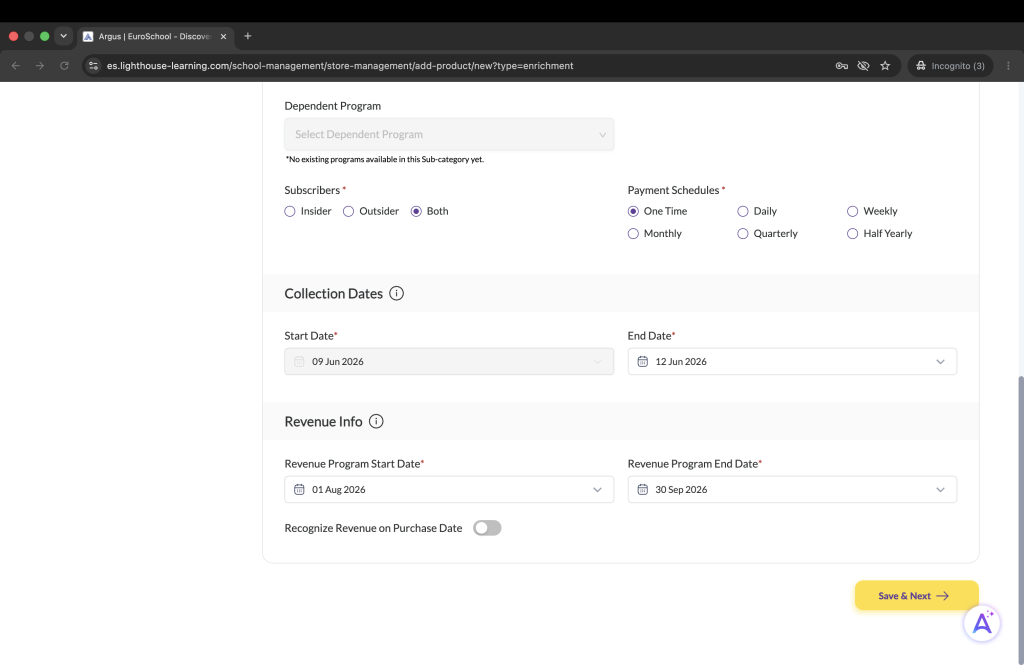
- subscribers: Insider, Outsider, or Both
- payment schedules: One Time, Daily, Weekly, Monthly, Quarterly, Half Yearly
- collection start and end dates
- revenue start and end dates
Please note the below revenue logic:
- Revenue Start Date should be greater than or equal to Collection End Date
- Revenue End Date should be greater than or equal to Collection End Date
- Revenue Start Date and Revenue End Date can be the same
If Recognize Revenue on Purchase Date is turned on:
- revenue will be recognized on the purchase date itself
- revenue start and end dates are not required and will be hidden
Please note:
- at least 1 image is mandatory
- maximum 5 images / videos can be uploaded
- all mandatory marked fields must be filled before moving ahead
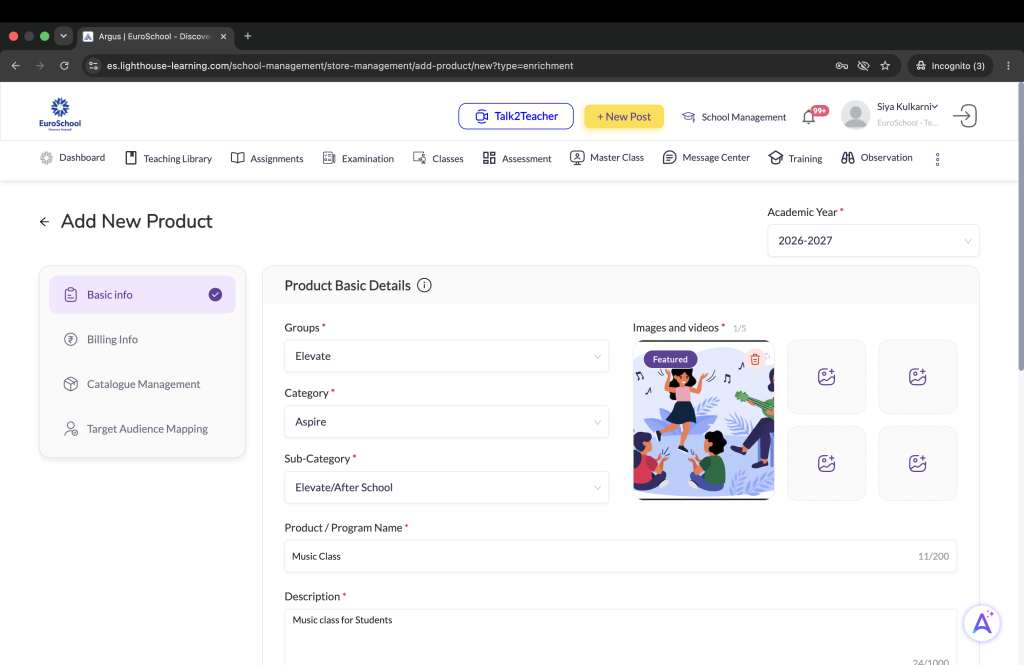
Expected Result: Basic Info is completed successfully.
Step 6: Move past Billing Info
Click Next.
The Billing Info section is filled by the Finance / HO team, so school-level users do not need to fill it.
You can move directly to the next section.
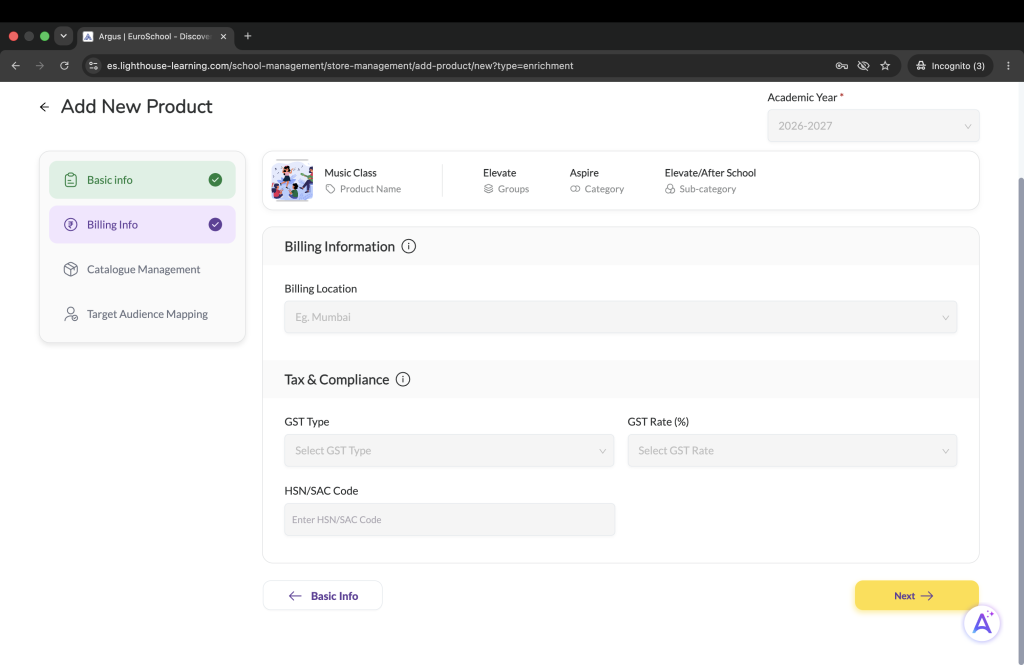
Expected Result: You reach the Catalogue Management section.
Step 7: Fill Catalogue Management
In Catalogue Management, fill:
- vendor
- purchase cost with GST
- purchase GST
- sales price with GST
Sales GST will be auto-filled based on Billing Info.
Available Quantity can be ignored for now.
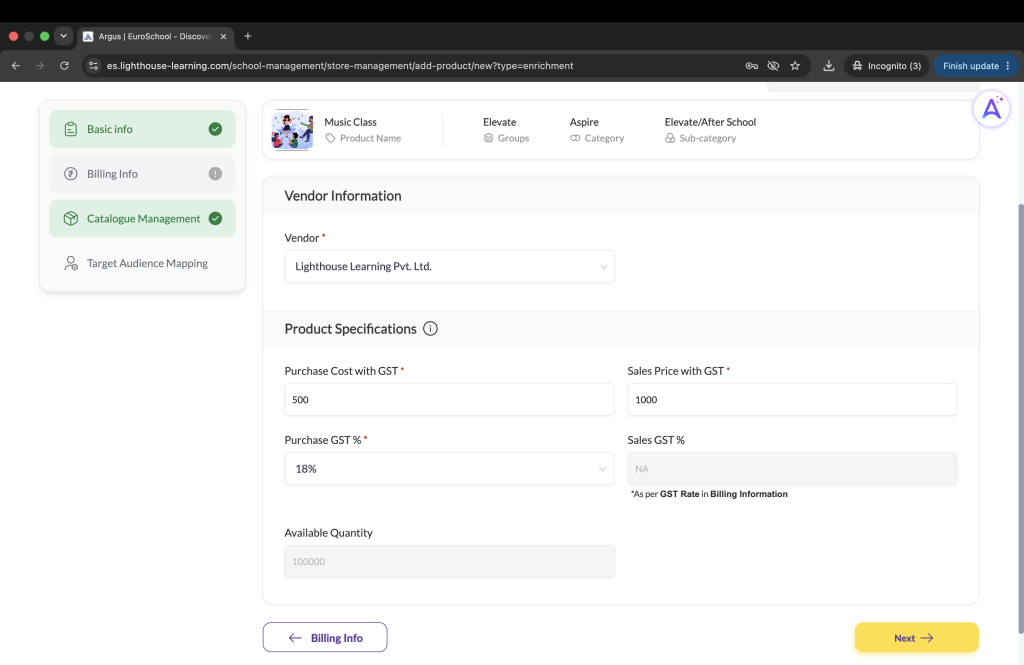
Expected Result: Catalogue Management is completed successfully.
Step 8: Fill Target Audience Mapping
Click Next and open Target Audience Mapping.
Here, your Brand and School will already be selected.
Now choose the target audience for the product. You can map it for:
- all students
- selected boards
- selected grades
- selected divisions
- selected students
Also enter Expected Students.
Based on this, the system will show the expected revenue summary such as revenue from event, cost of event, LLPL share, and vendor share.


Expected Result: The target audience is mapped successfully.
Step 9: Send the product for approval
After reviewing all details, click Send For Approval.
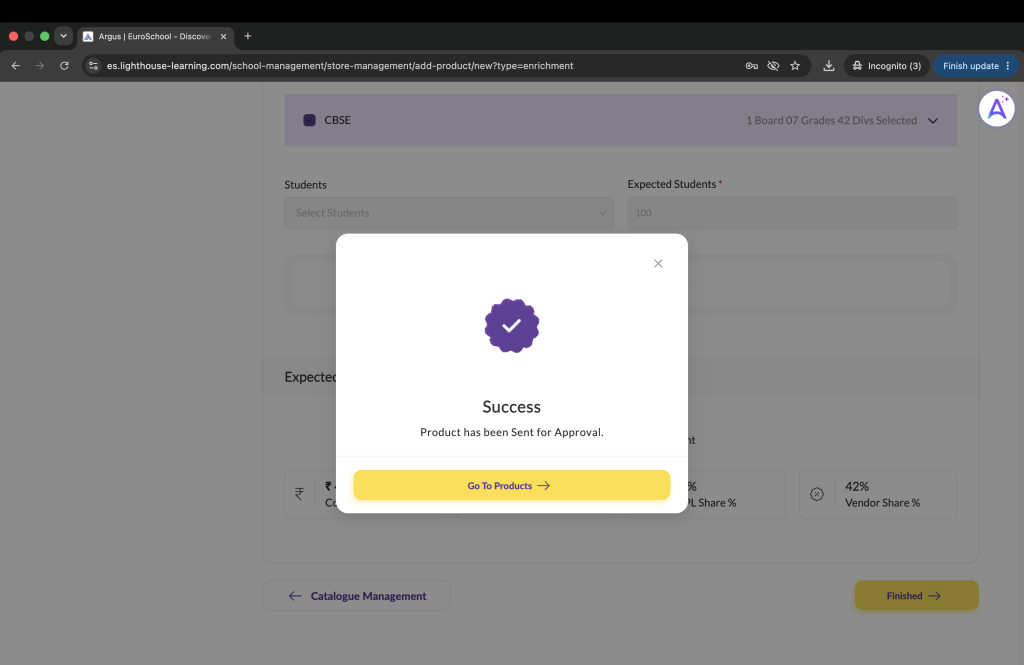
Expected Result: A success message is shown and the product status moves to Ops Pending.
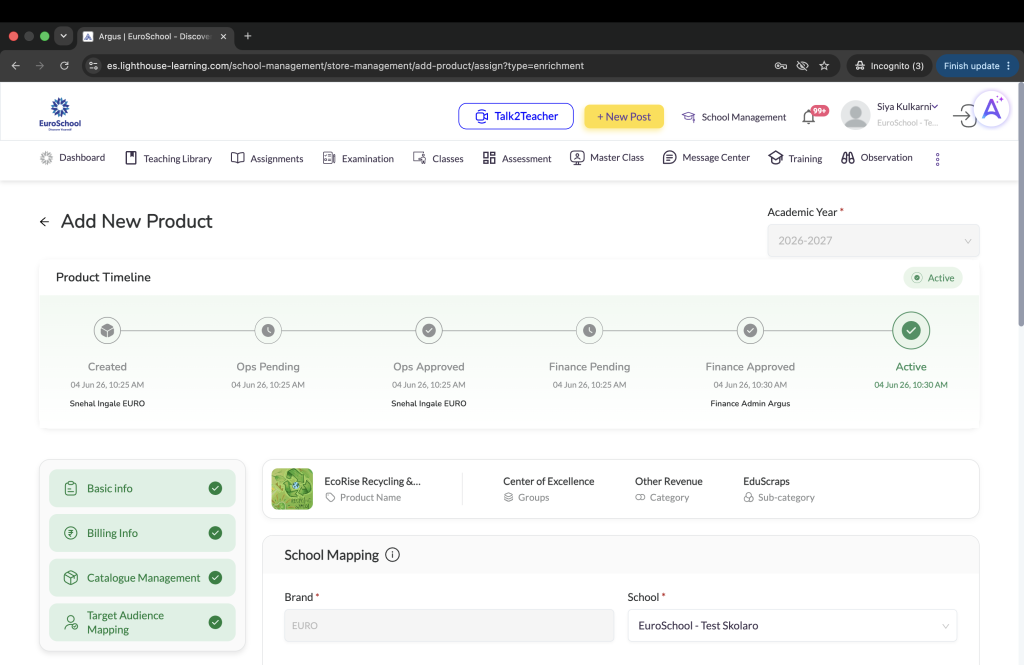
Step 10: Track the product status
After submission, you can track the product status from the listing page.
The product can move through these stages:
- Ops Pending
- Finance Pending
- Active
- Rejected
Once the product becomes Active, it becomes visible to parents.
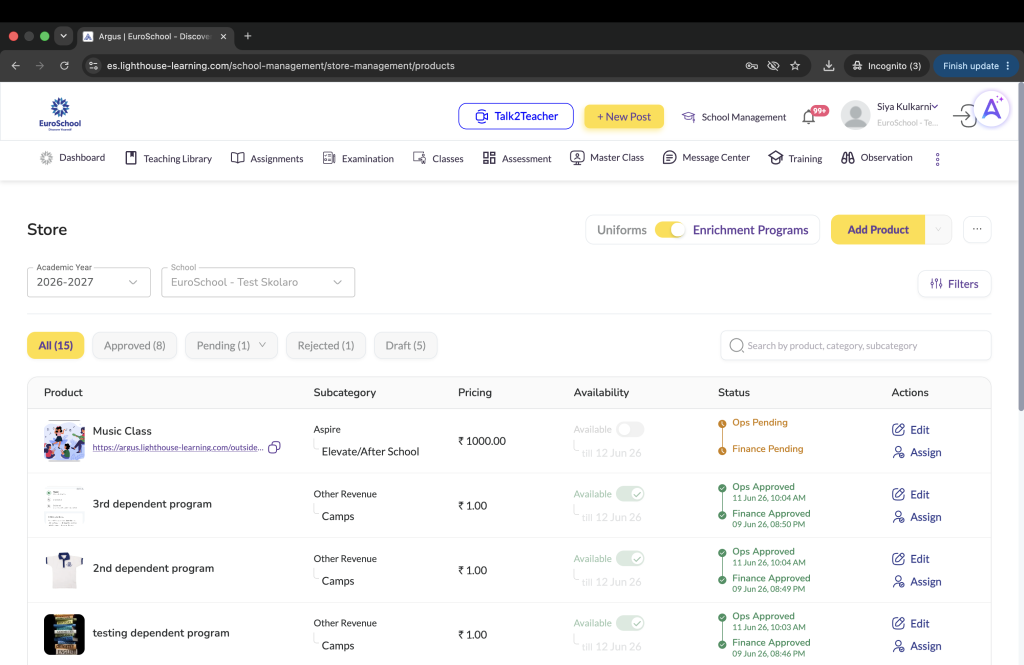
Expected Result: You can track the approval journey of the product.
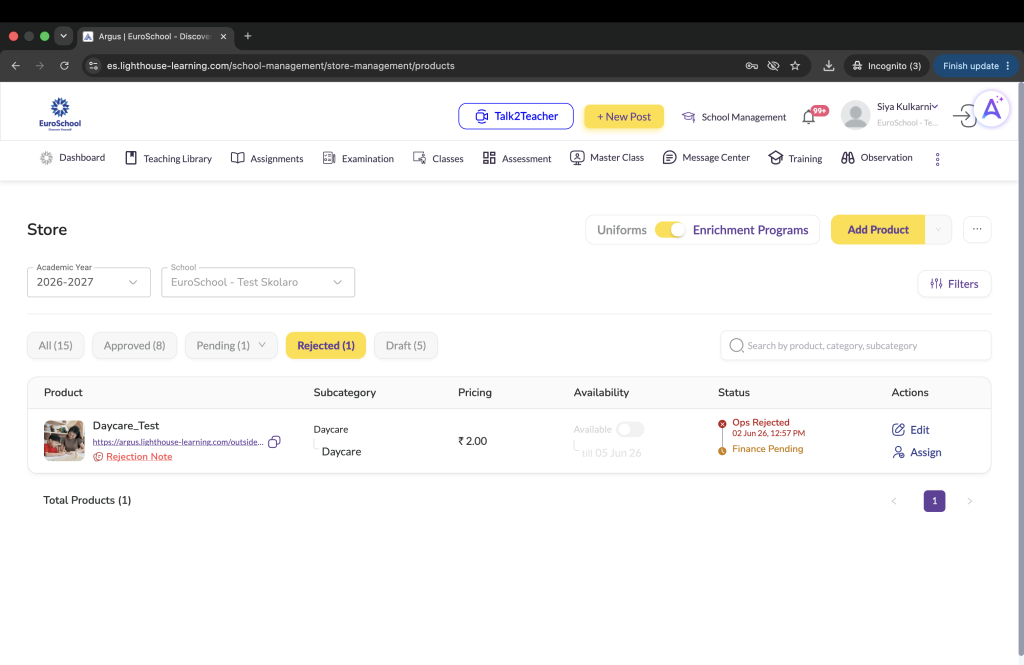
Step 11: Check rejection note and edit if needed
If the product is rejected:
- open the Rejected tab
- click Rejection Note to view the reason
- click Edit
- update the product as required
- resubmit it for approval

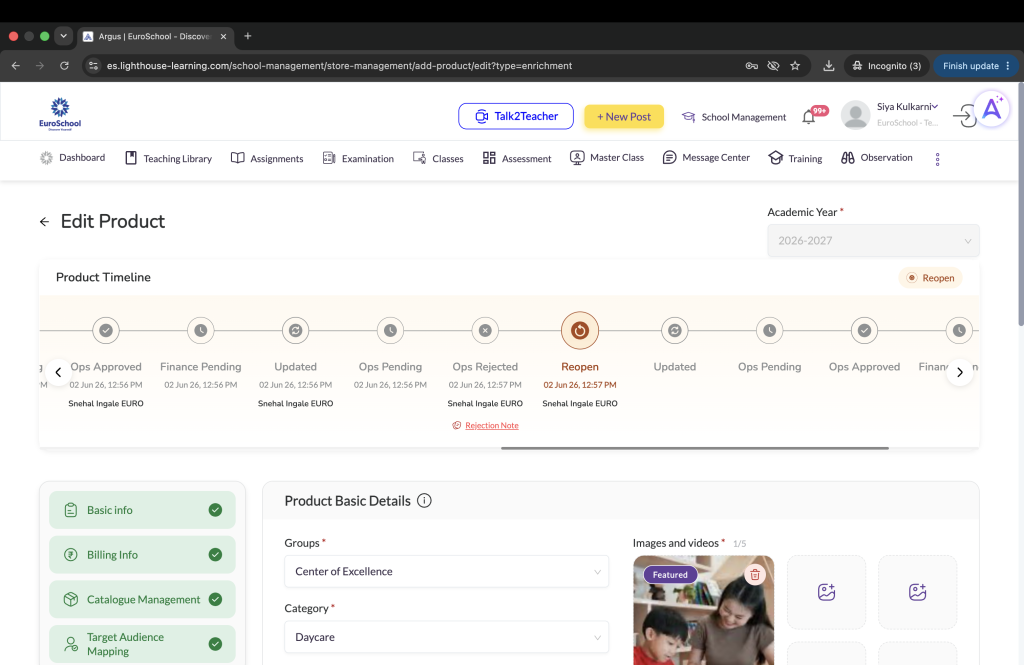
You can also view the Product Timeline inside the product to understand the full status journey.
Expected Result: You can correct and resubmit the rejected product.
Step 12: Product goes live after final approval
Once the product receives both:
- Ops Approval
- Finance Approval
the product becomes Active.
This means the product is now live and visible to parents in the Store Module until the configured availability / collection end date.
Expected Result: The product goes live for parents after final approval.
Important Notes
- Please create or confirm the Vendor before creating the product
- once the product is sent for approval, it cannot be edited during the approval stage
- please review all details carefully before sending for approval
- collection dates define the parent-side buying window
- if Recognize Revenue on Purchase Date is enabled, revenue dates are not required
- Billing Info is maintained by the Finance team
Frequently Asked Questions (FAQs)
Yes. The vendor should already be available before product creation.
Yes. At least one image is mandatory.
The Billing Info section is handled by the Finance / HO team.
No. Once the product is in approval stage, it cannot be edited until it is rejected or reopened.
The product goes live after both Ops and Finance approvals are completed.
Collection Dates decide when the product is visible and available for parents to buy.
Revenue Dates decide when the revenue will be recognized in the system.
You will not be able to tag the correct vendor in Catalogue Management, so the product creation will not be completed properly.
Yes. In Target Audience Mapping, you can create the product for all students or only for selected boards, grades, divisions, or students.
Ops Pending means the product has been sent for approval and is currently waiting for review from the Operations team OR Finance team.