
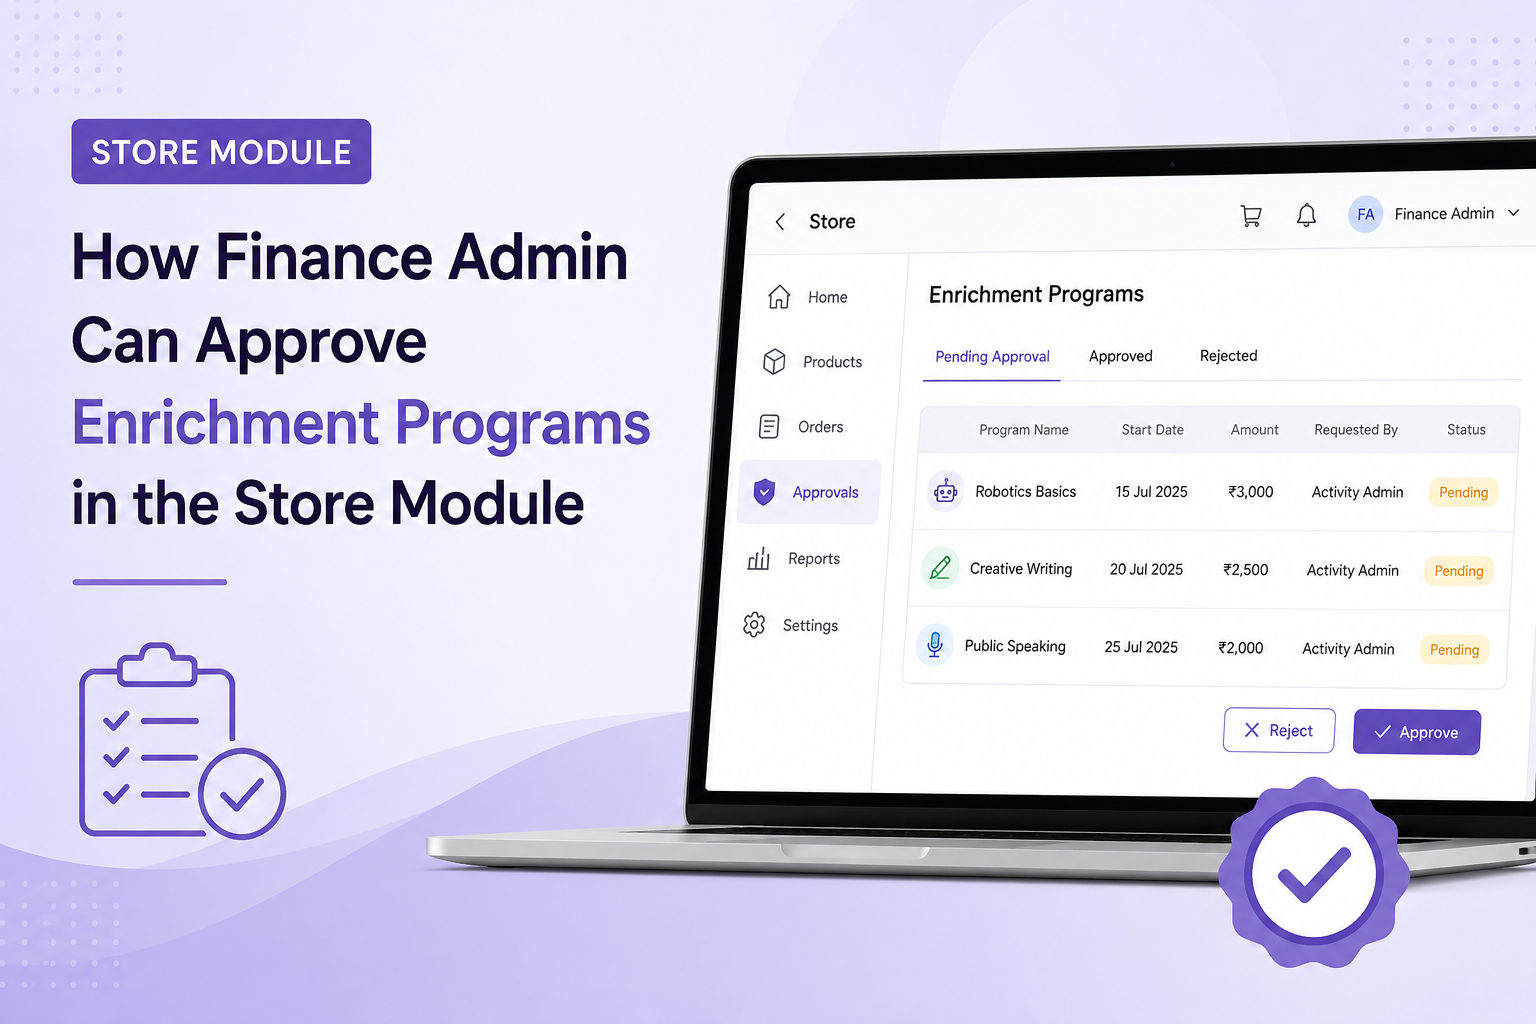
This guide explains how a Finance Admin can review and approve Enrichment Programs in the Store Module.
The Finance team can review finance-pending products, fill the required billing details, and approve the product so that it becomes live for parents.
What You’ll Learn
- how to open Store Management as Finance Admin
- how to check finance-pending products
- how to select the school and review the product
- how to fill billing information
- how to approve the product
- what happens after approval
Who Can Use This
Applicable Role:
- Finance Admin
Before You Begin
Please note:
- Finance Admin will land on the Enrichment Programs section by default
- products must be Ops Approved before Finance can approve them
- Finance must fill the required Billing Information before approving the product
- once approved, the product becomes live for parents
Step 1: Log in to the staff portal
Open the login page.
- Select Staff
- Enter your login credentials
- Click Proceed
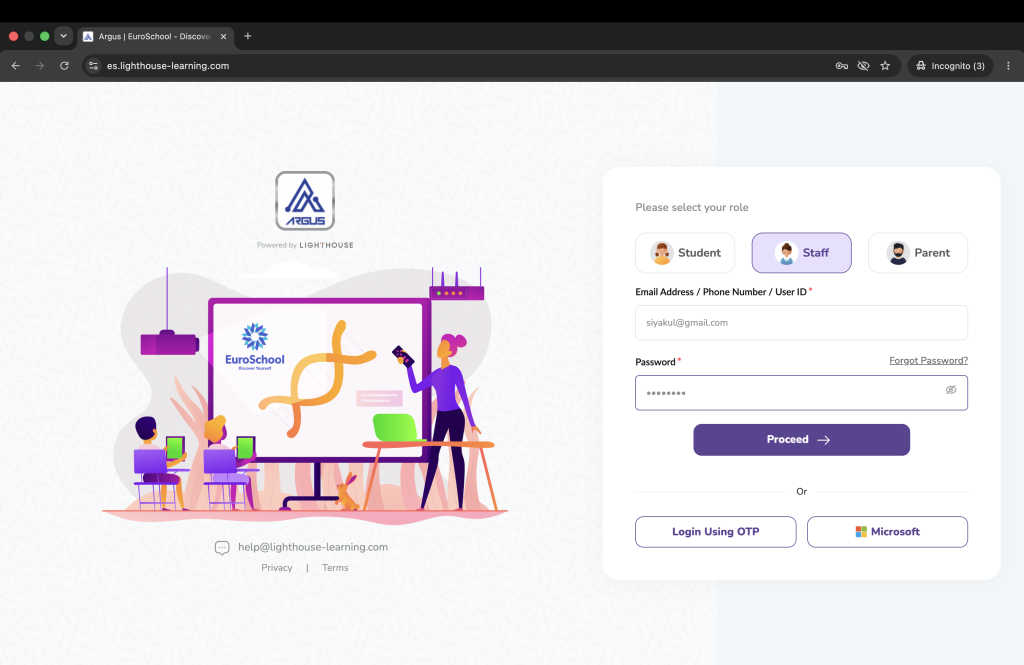
Expected Result: You are logged in successfully as a Finance Admin.
Step 2: Open Store Management
After login:
- go to School Management
- click Store Management
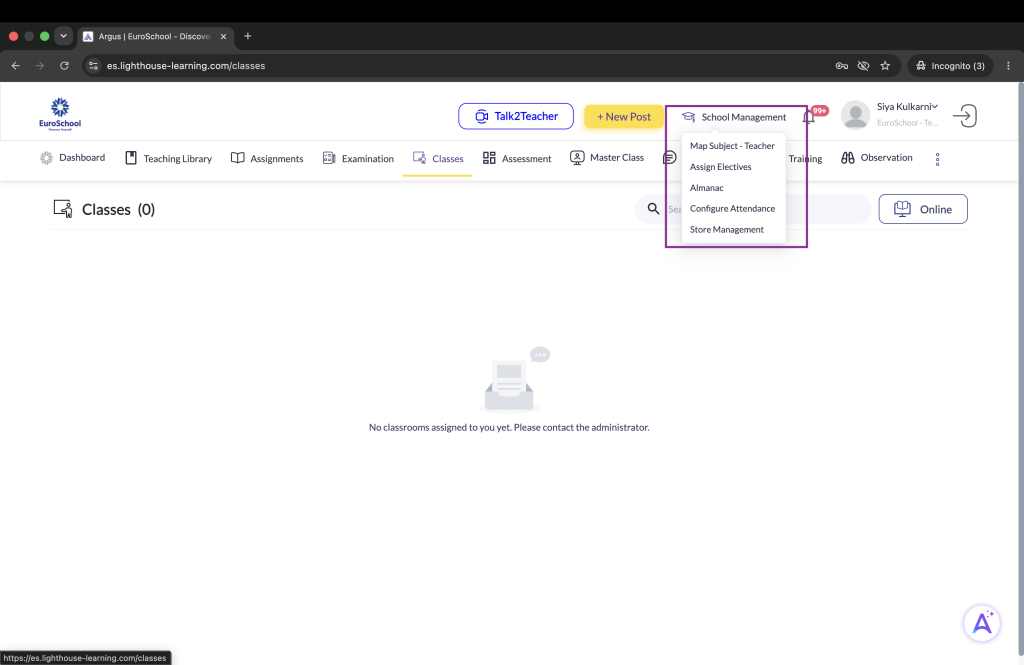
Expected Result: You land on the Store Management page.
Step 3: Select the required school
On the Store page, Finance Admin can see products across schools.
- use the School dropdown
- select the school for which you want to review and approve products
You will then be able to see the finance-pending products for that school.
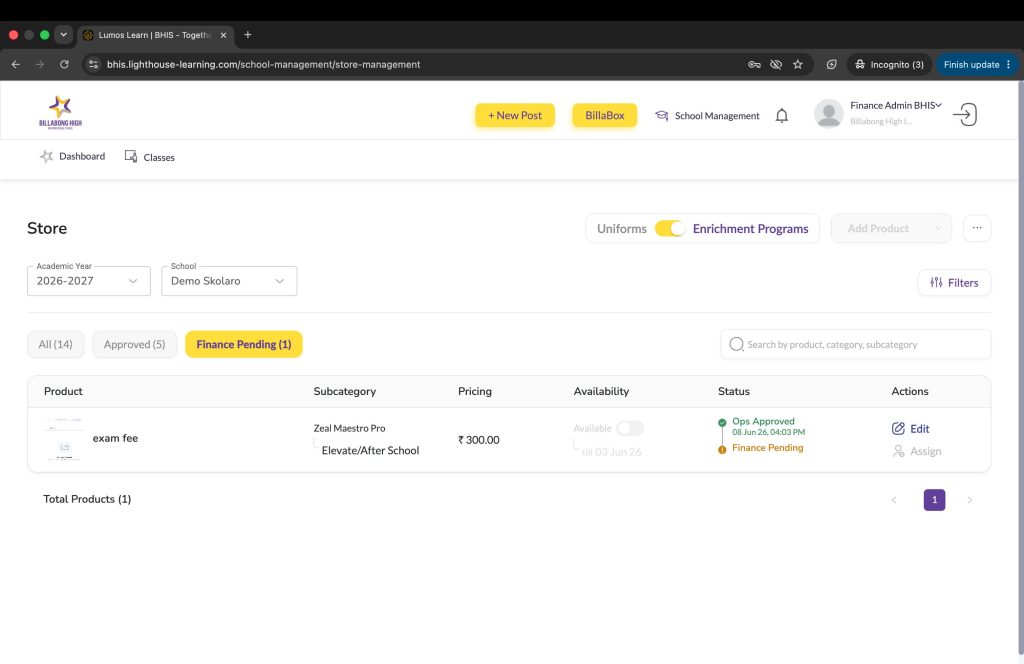
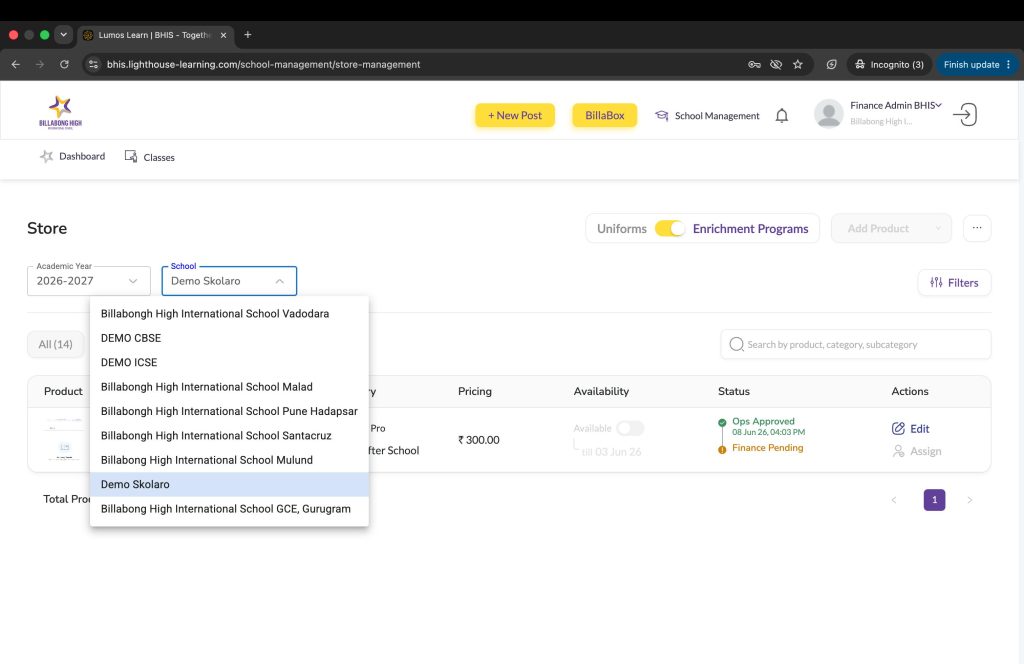
Expected Result: The selected school’s finance-pending products are visible.
Step 4: Open the finance-pending product
Go to the Finance Pending section and identify the product to be approved.
- click Edit for the required product
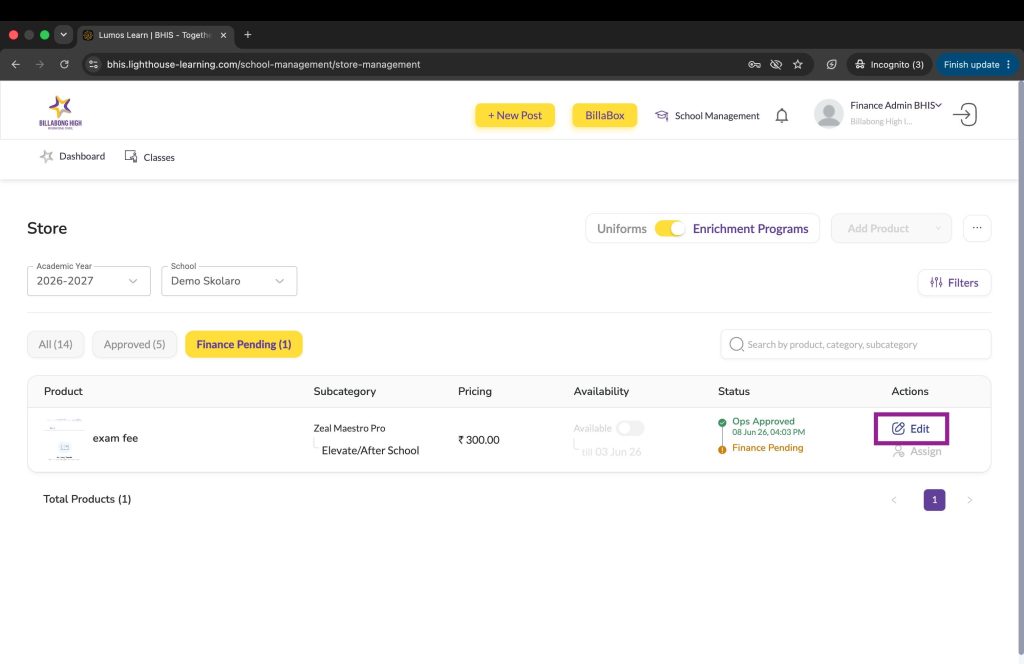
Expected Result: The product detail page opens.
Step 5: Review the product details
On the product detail page, first review the product details and timeline.
You can verify:
- product name
- group, category, and sub-category
- product timeline
- collection dates
- revenue dates
- other configured details
After reviewing the details, click Next to move to the Billing Info section.
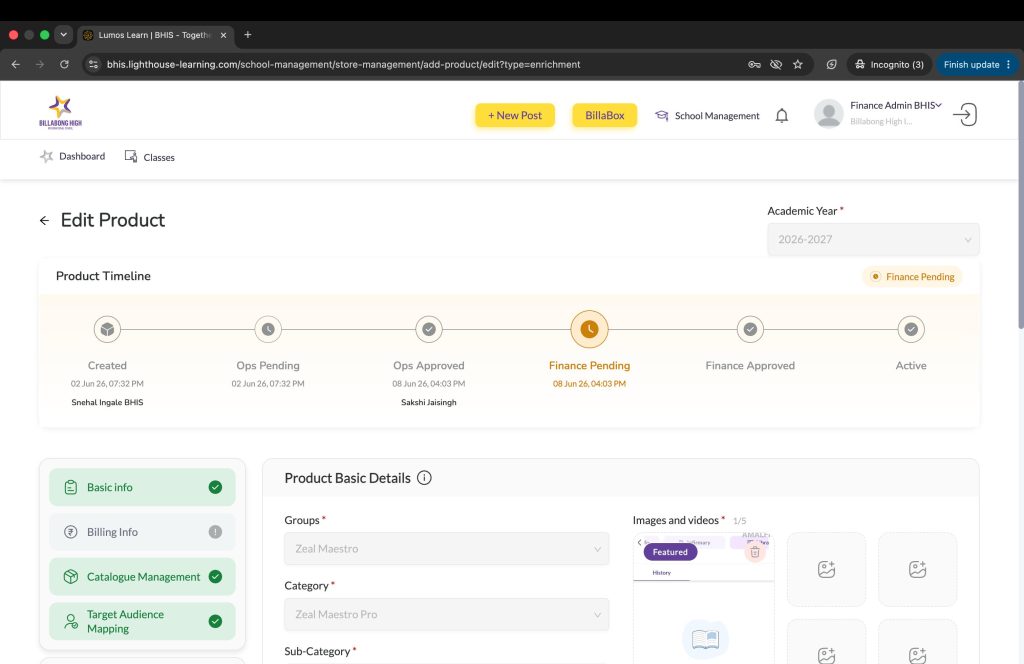
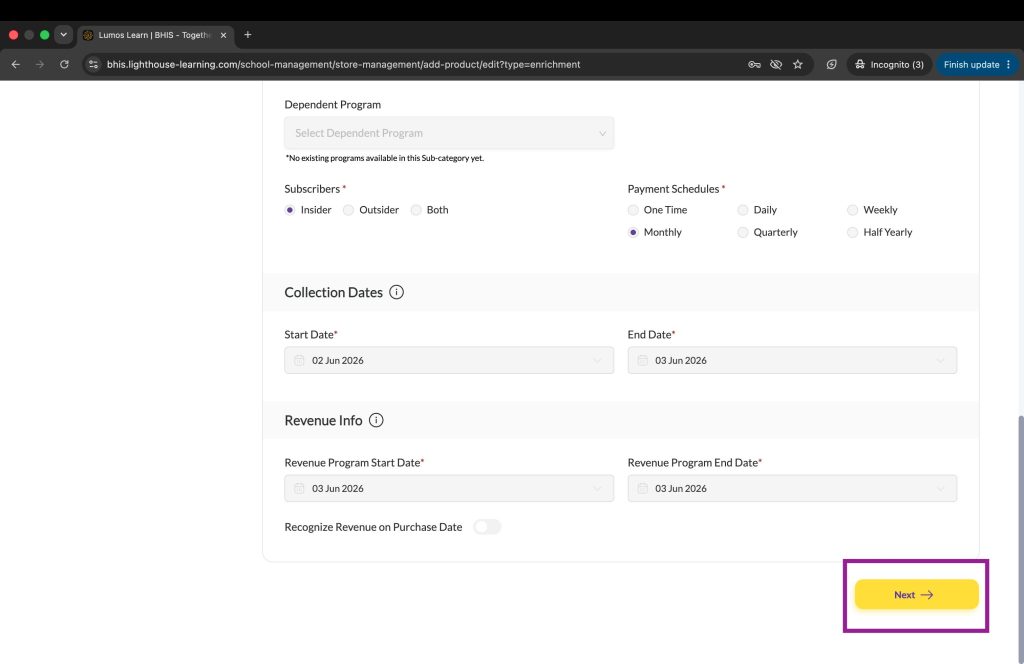
Expected Result: You move to the Billing Information section.
Step 6: Fill Billing Information
In Billing Information, Finance Admin must fill the required fields:
- Billing Location
Finance can select either:- HO / Lighthouse Learning
- School location
- GST Type: Interstate/Intrastate
- GST Rate: 0%, 5%, 18%
- HSN / SAC Code
These details will be decided by the Finance team for that particular product.
Once the required fields are filled, save the information.
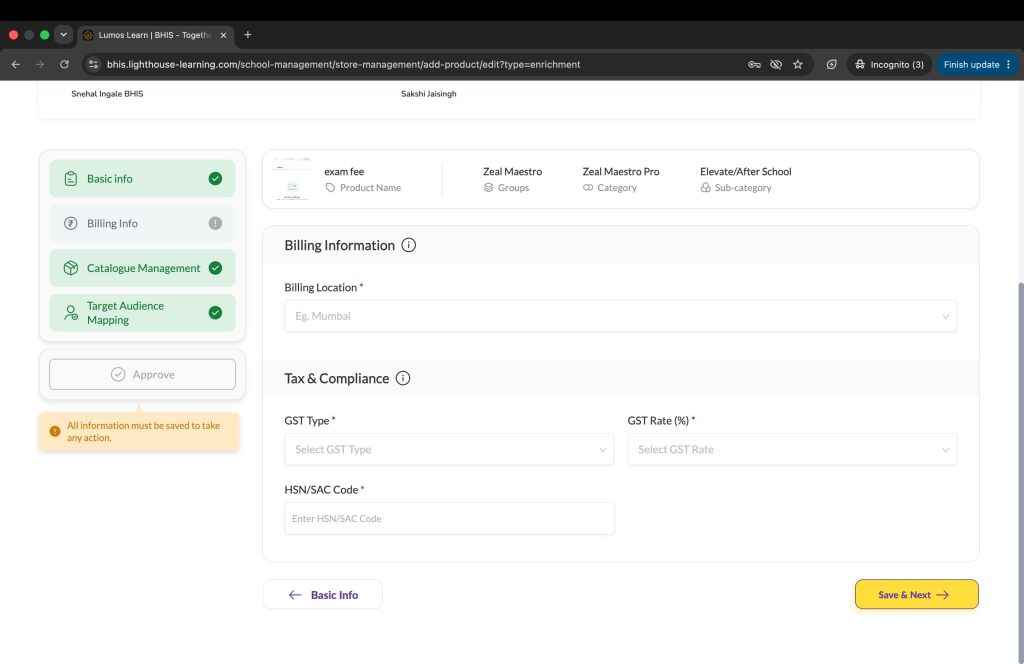
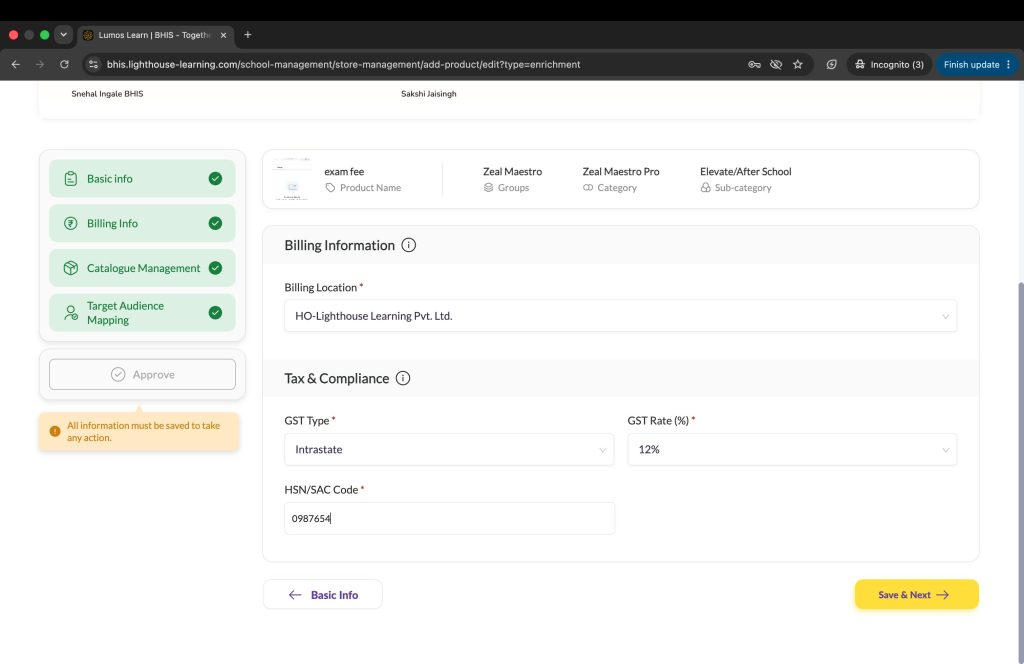
Expected Result: Billing Information is completed successfully.
Step 7: Approve the product
After saving the billing details:
- click Approve
- confirm the approval in the pop-up
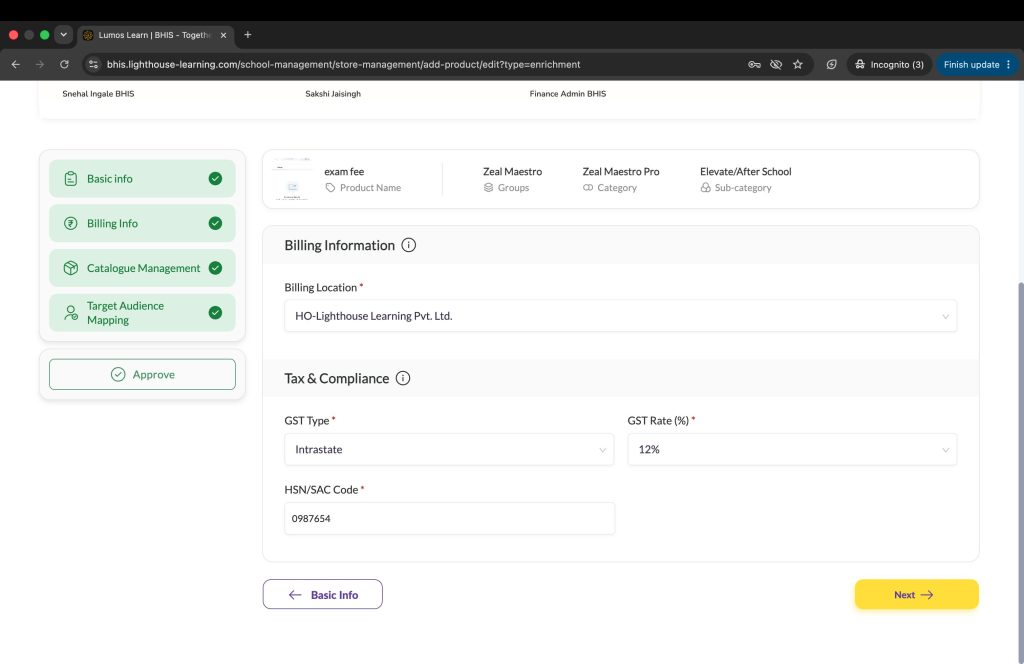
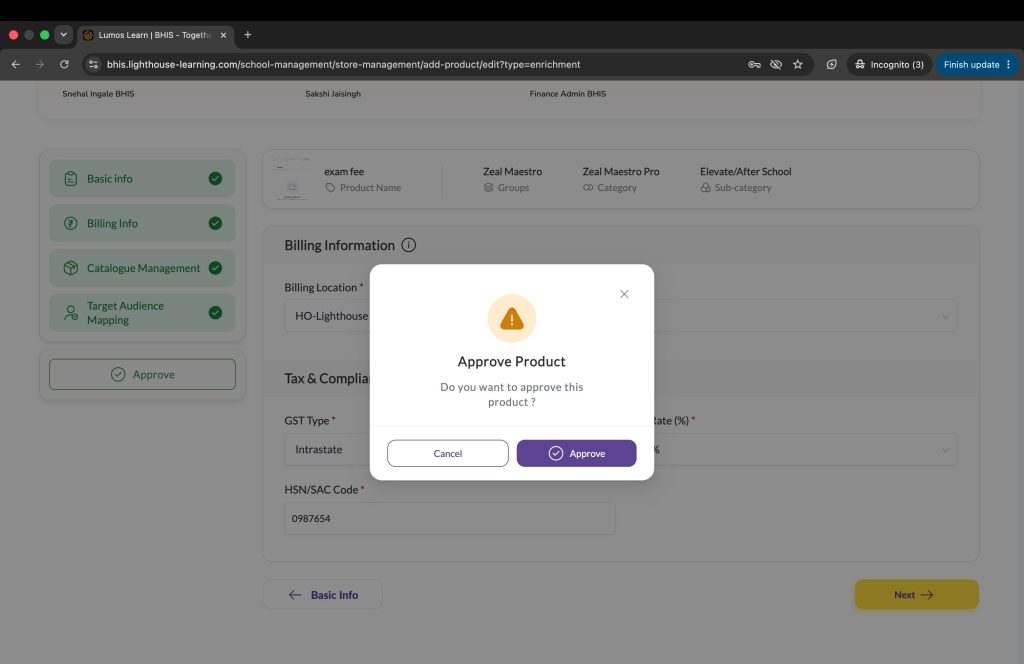
Expected Result: The product is approved successfully.
Step 8: Product goes live after Finance approval
Once Finance approves the product, it moves out of the Finance Pending stage.
The product will then appear under the Approved section and becomes live for parents.
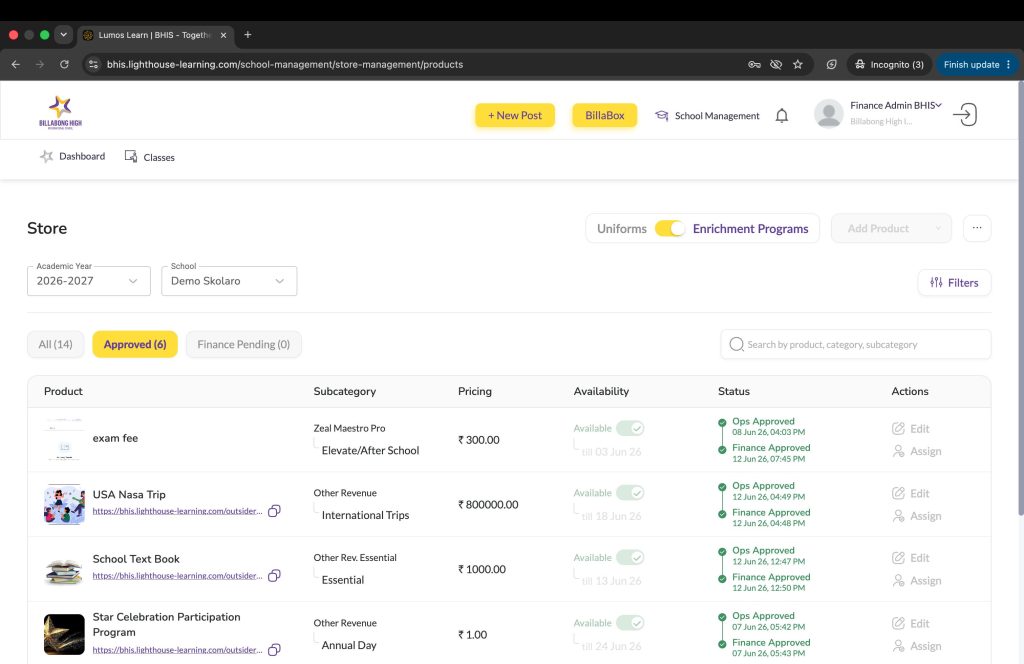
Expected Result: The approved product is live and visible to parents.
Step 9: Approve more products if required
To approve more products:
- go back to the Finance Pending section
- select the required school again if needed
- open the next finance-pending product
- repeat the same process
Expected Result: You can continue approving the remaining products.
Important Notes
- Finance Admin should first select the correct school before reviewing products
- only finance-pending products need Finance approval
- Finance must fill the billing details before approval
- Billing Location can be either HO or the School
- once approved, the product becomes live for parents
- after approval, the product will appear in the Approved section
